How to Set Up a Secure Office Package Room
A secure office package room is a dedicated, controlled space where all inbound deliveries are received, logged, stored, and picked up. It replaces the scattered approach of leaving packages at front desks, on counters, and in hallways with a single location built around accountability and workflow. If your office receives more than a handful of packages each day and you do not have a dedicated room for them, you are losing time, losing packages, and exposing your organization to liability that a proper setup eliminates.
The need for a dedicated package room is driven by volume. U.S. parcel shipments reached 22.4 billion in 2024 according to the Pitney Bowes Parcel Shipping Index, and an Edelman Intelligence workplace survey found that 69 percent of office workers have personal packages delivered to their workplace. That means your facility is handling a growing mix of business shipments, vendor deliveries, and personal orders that your lobby, front desk, and hallways were never designed to absorb. A Security.org report estimates that 37 million packages worth more than $8 billion were stolen in the United States in a single year, and security consultants consistently note that mail rooms positioned in basements or low-traffic areas without access controls are among the most common vulnerability points in commercial buildings.
Step 1: Choose the Right Location
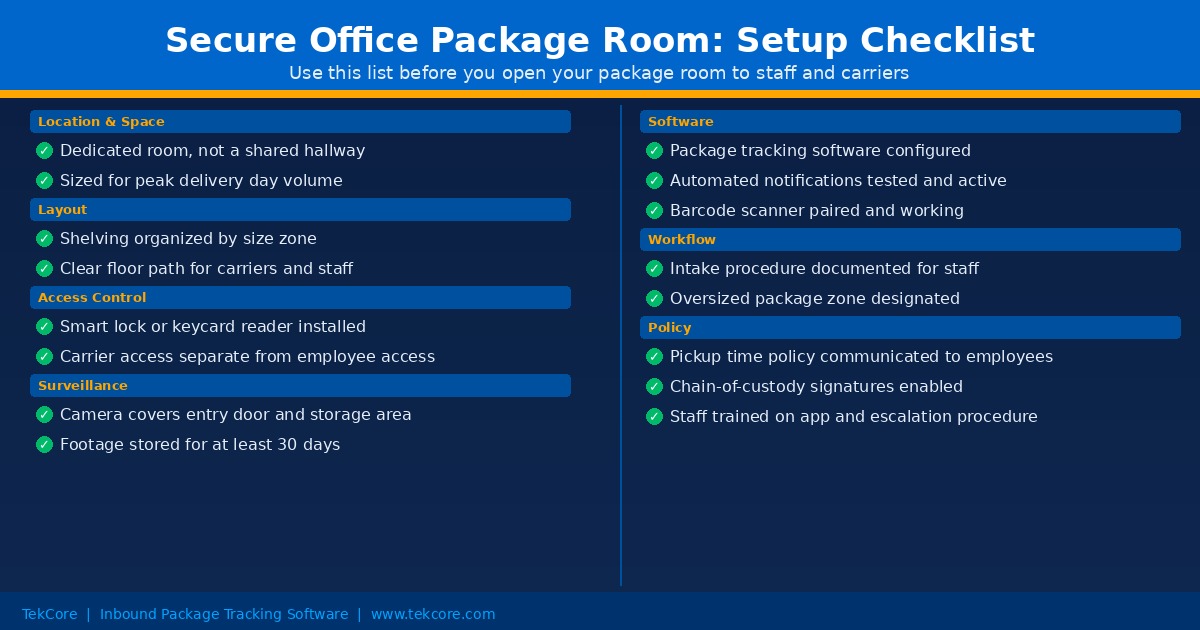
The location of your package room shapes everything that follows. Choose a space that carriers can access without passing through sensitive office areas. A room near a side entrance or loading dock works best because delivery drivers can drop off packages without walking through the building. At the same time, the room needs to be accessible to recipients so they can pick up packages without a long detour that discourages timely retrieval.
Size the room for your peak delivery day, not your average day. Count your highest-volume day over the past three months and add a 20 percent buffer. Package volume at many facilities has increased more than 35 percent in the last five years, and designing for today’s average means you will outgrow the space within a year or two. If your office receives 80 packages on a normal day but 150 during the holiday season or fiscal year-end, the room needs to handle 150 comfortably with space left over.
Step 2: Design a Layout That Supports Workflow
A package room is not a storage closet. The physical layout should mirror the actual workflow: packages arrive, get logged, get stored in an organized location, and get retrieved by recipients. Designing around this sequence prevents congestion and reduces errors.
Install adjustable heavy-duty shelving and organize it into size zones. A small zone handles envelopes and flat packages. A medium zone handles standard boxes. A large or floor-level zone handles oversized items. Label each zone clearly so that carriers and staff know exactly where to place deliveries. Mark off individual shelf positions and assign codes that match the recipient’s pickup notification, so mailroom workers can locate any package in seconds without searching.
Keep a clear center path wide enough for a hand truck or dolly. Carriers delivering 30 packages at once need room to move. Place the intake station near the entrance so staff can log packages immediately upon arrival without carrying them across the room first. If your organization handles sensitive or high-value items (pharmaceuticals, legal documents, executive mail), designate a secondary locked section within the room for those deliveries.
Step 3: Implement Layered Access Control
A traditional lock and key is not appropriate for most office package rooms. Keys get copied, lost, and shared. Layered access control means different levels of entry for different people, all with audit trails.
For carrier access, use an intercom or keypad entry with codes that you can update regularly. Carriers need to get in, drop off packages, and leave without requiring a staff member to walk them through the building every time. For employee access, use keycard readers or PIN-based smart locks that create timestamped logs of every entry. For high-security environments (government, healthcare, financial services), biometric readers add a third layer.
The critical point is the audit trail. Every entry should be logged with a timestamp and an identity. When a package goes missing, the access log tells you exactly who was in the room and when. An access control system for a package room typically costs $200 to $3,000 for hardware, plus possible monthly service fees; that is a fraction of the cost of a single high-value package dispute. A Multifamily Crime Poll found that 61 percent of property managers reported package theft was up or up significantly, and security consultants say many facilities still do not have cameras on their mail rooms.
Step 4: Install Surveillance That Works
Cameras serve two purposes: deterrence and documentation. Install a minimum of two cameras, one covering the entry door and one covering the main storage area. The entry camera should be positioned to capture faces clearly, not just the tops of heads.
Use continuous or motion-triggered recording with 30 to 90 days of retention. Connect cameras to your access control system so recordings are timestamp-linked to entry logs. If an incident occurs, you can pull the footage for the exact time someone badged into the room rather than scrubbing through hours of video.
Lighting matters as much as camera placement. Install consistent LED lighting with no dark corners, particularly around the intake station and main shelving areas. A camera in a dimly lit room produces footage that is useless for identification. Security professionals consistently emphasize that the combination of visible cameras and good lighting is the single most effective theft deterrent for package rooms.
Step 5: Implement Package Tracking Software
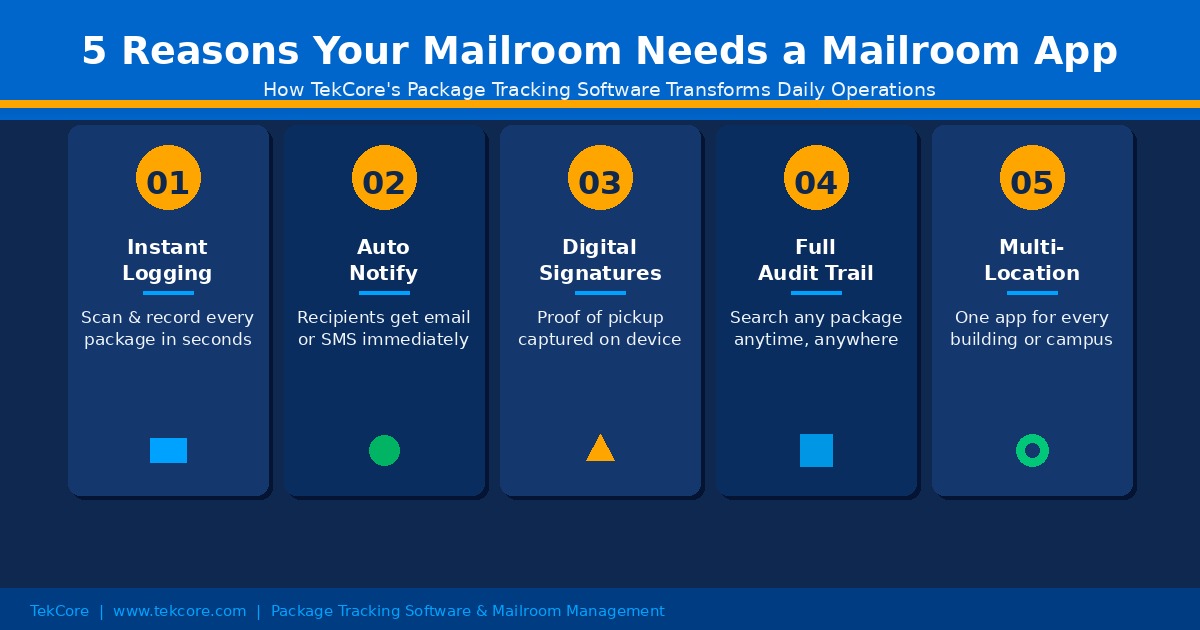
Physical security handles who enters the room. Package receiving software handles accountability for every item inside it. Without software, you have a locked room full of packages and no reliable way to know what is in there, who it belongs to, or how long it has been sitting.
When a package arrives, a staff member logs it using a barcode scanner, smartphone camera, or manual tracking number entry. The software captures the carrier, tracking number, recipient, and timestamp automatically. The system sends an email, text message, or both to the recipient. When the recipient arrives to pick up, the software captures a digital signature, timestamp, and optional photo. That record is stored permanently and searchable by name, tracking number, carrier, date, or status.
This digital chain of custody is what transforms a package room from a storage space into an accountable operation. When a recipient says “I never got that package,” the system shows exactly when it arrived, who logged it, where it was stored, when the notification was sent, and who signed for it. For organizations in healthcare, government, and legal services, this documentation is not optional; it is a compliance requirement. HIPAA penalties for mishandled protected health information range from $100 to $50,000 per violation.
Step 6: Build a Reliable Intake and Pickup Workflow
The best room design and technology in the world will fail without a documented workflow that staff follow consistently. Here is what a reliable intake-to-pickup process looks like.
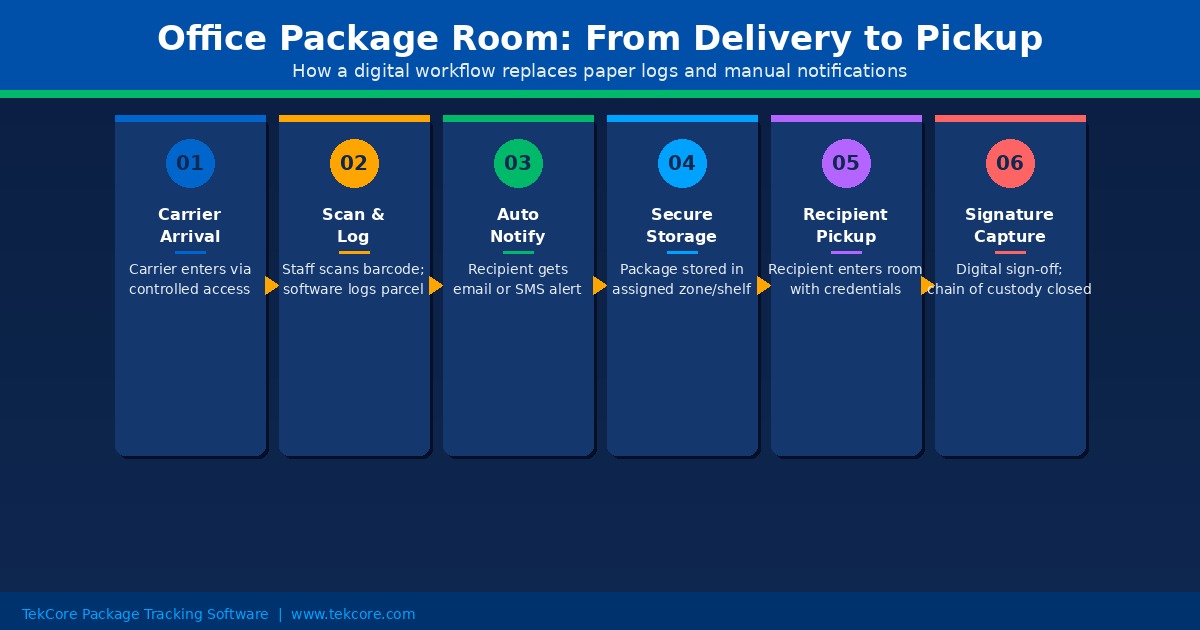
Intake workflow
The carrier arrives and enters through the designated access point. A staff member scans each package. The software logs the delivery, matches it to a recipient from your directory, and sends a notification. If the package lacks a scannable barcode, the staff member enters the tracking number manually or the software generates an internal tracking label. The package is placed in the correct size zone on the shelf, with the shelf position code matching what the recipient sees in their notification.
Pickup workflow
The recipient receives a notification with the package location. They come to the room, locate their package using the shelf code, and sign digitally on a tablet or phone. The software confirms the pickup, closes the record, and frees the shelf position. If a package is not picked up within the period you define (48 hours is a common standard), the system sends automatic reminders. After a longer period, the package is flagged for escalation or return.
Document both workflows in writing. Train staff on the full process before launch, including what to do when a barcode is damaged, when a package has no recipient name, and when a carrier delivers after hours. A 30-minute training session covers the complete workflow for most teams.
Step 7: Plan for Oversized and Special Deliveries
Standard shelving does not accommodate palletized shipments, furniture, or large equipment. Designate a floor-level zone for oversized items and label it clearly. Configure your package tracking software to include a size or type field so recipients know their item is in the oversized zone rather than on a standard shelf.
For sensitive or high-value items, use a secondary locked area within the package room. Medical supplies, legal documents, and executive correspondence may require restricted access beyond what the main room provides. The same software should track these items with the same chain of custody, just with an additional access layer for the restricted section.
Step 8: Write Clear Policies and Train Your Team
A package room without written policies is a room where every staff member invents their own process. Document policies that address authorized recipients and identification requirements, package retention limits (how long an unclaimed package stays before escalation or return), procedures for damaged packages, after-hours delivery handling, and the process for revoking access when an employee leaves the organization.
Communicate the new system to all employees before launch. Let them know where the room is, how notifications work, what their pickup window is, and what happens if they do not pick up within the deadline. Clear expectations reduce unclaimed package backlog, which is the single biggest operational headache in package rooms that lack enforcement.
Common Mistakes That Undermine Package Room Security
Even well-designed package rooms fail when these mistakes creep in.
- Sizing for average volume instead of peak volume. The room works fine in March but overflows in December. Design for your busiest day plus a growth buffer, not your typical Tuesday.
- Sharing access credentials. When one keycard or code is shared among multiple people, the audit trail becomes meaningless. Every person who enters the room should have their own credential.
- Skipping package tracking software. A locked room with cameras but no software still cannot tell you which packages are inside, who they belong to, or how long they have been there. Physical security and digital accountability are two different layers, and you need both.
- Relying on carrier labels for internal routing. Carrier labels are designed for transit, not for internal distribution. Print internal routing labels with recipient name, department, and shelf location so packages can be found without reading a FedEx label sideways.
- No policy for uncollected packages. Without a pickup deadline, packages accumulate indefinitely. Set a retention policy (48 to 72 hours is standard), send automatic reminders, and have a documented process for what happens after the deadline passes.
- Cameras without adequate lighting. A camera in a dim room captures motion but not faces. LED lighting with no dark corners is the minimum standard.
- Failing to revoke access when employees leave. Former employees with active keycards or known PIN codes are a security gap that grows with every departure. Build access revocation into your offboarding checklist.
TekTrack handles the software side of the package room you just built: multi-method intake logging, automatic recipient matching, configurable notifications, and complete chain-of-custody records from arrival to signature. You can compare editions and features or schedule a demo to see it in action.
